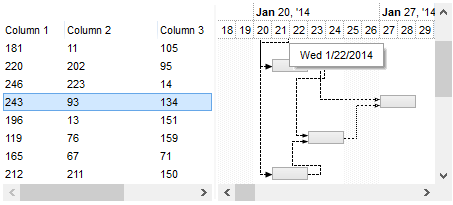
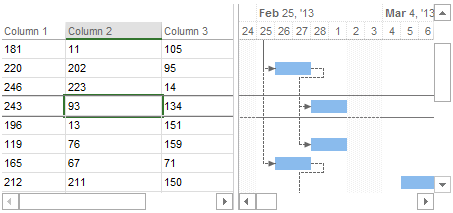
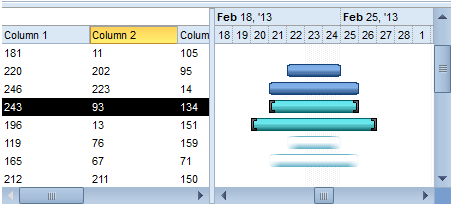
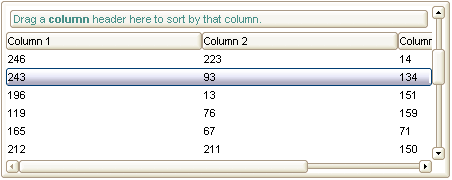
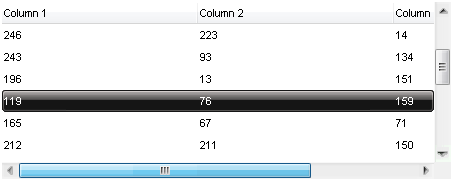
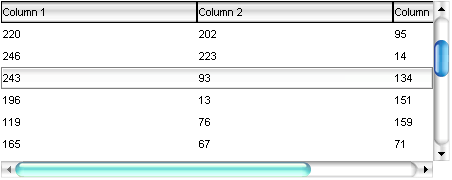
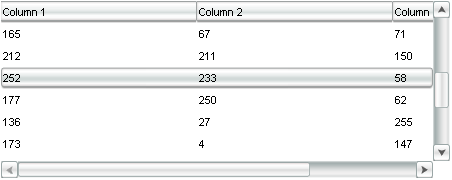
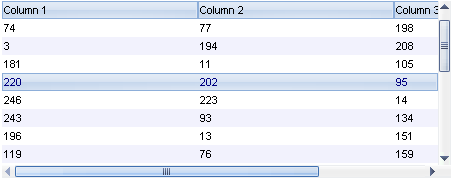
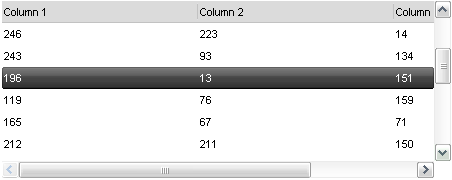
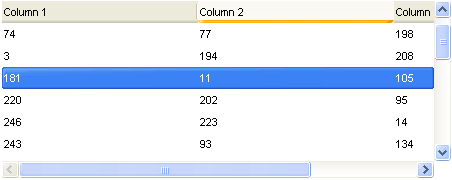
 The EBN file provides skin capabilities for almost all of our UI components.
The Exontrol's eXButton/COM installs a WYSWYG Builder
( Builder.exe ) that helps
creating and editing EBN files. The skin
method, in it's simplest form, uses a single graphic file assigned
to the client area of the painting object. By using a collection of
objects laid over the graphic, it is possible to define which
sections of the graphic will be used as borders, corners and other
possible elements, fixing them to their proper position regardless
of the size of the painting object. The skin file ( EBN ) is
organized as a hierarchical list of objects. Each object can display
a portion of picture with attributes like tile, stretch or
transparent or a background color. The position for each child
object is relative to its parent, and can be aligned to any side of
the parent's client area.
- Introduction ( Stretching vs EBN )
- Installing the EBN - WYSWYG -builder
- General view of the EBN builder
- Step-by-step guide to create simple EBN files
- Step-by-step guide to create complex EBN files
- Creating an EBN file from a picture ( transparent regions )
- EBN String Format, BackgroundExt / BackgroundExtValue
- Encoding EBN files
- Skinning a component, or changing its visual appearance
- Recommendations
- EBN Versions
- Samples
- Gallery
Also, you can view the following items:
-
 Create the EBN file from a screen shot.
 -
 Create
a complex EBN file within a minute.
 -
 Rendering the EBN objects in the component.
 -
 Using the
Exontrol's ExPropertiesList to browse EBN objects.
What's the difference between stretching a picture and EBN technology?
The main difference is that they doesn't look the same when the
picture or the EBN is stretching or applied to the same object. Also, simple
stretching a picture won't hide transparent points or create not
rectangular regions. Here's illustrated the difference between stretching a picture and
using the EBN file with the same bitmap as ![]() .
.
If we stretch the picture we get ![]() and we get
and we get ![]() if the EBN file is applied to the same object.
if the EBN file is applied to the same object.
The eXButton/COM installs the WYSWYG Builder to create, view or edit EBN files. The eXButton/NET configuration does not install the EBN's builder. Please go to eXButton's download page here, and download and install the COM/ActiveX version or you can download it directly here. Once you install the eXButton/COM setup, it provides the EBN's builder, as well as a Windows Shell Extension that allows viewing the EBN files in your Windows Explorer as you would see the BMP or picture files in the thumbnail view. Also, you can view the EBN content by dragging the file from your Windows Explorer on the Exontrol's eXImages tool that can be found here.
The following screen shot shows the Windows Explorer before installing the eXButton/COM:

while the next screen shot shows the Windows Explorer after installing the eXButton/COM ( you can see the visual appearance for each EBN file ).

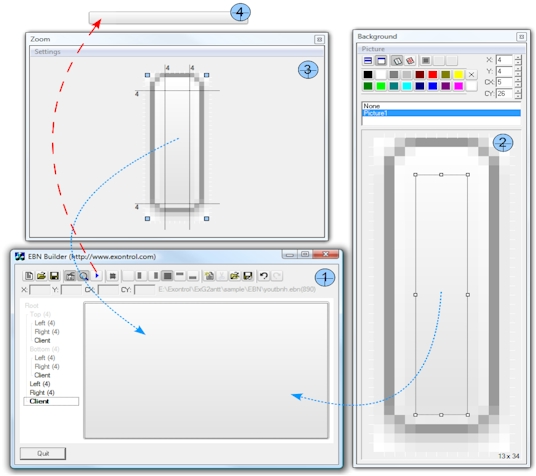
General view of the EBN builder:
Currently, the EBN builder may show one or more panels, such as Designer, Background, Zoom and Test.
- The Designer is the main panel of the tool that displays elements that composes the EBN file/object. In the designer, you can add/remove/update any element in the EBN composition.
- The Background panel displays the list of pictures / solid colors that may be applied to any element in the EBN composition.
- The Zoom panel can be used to collect and fill the EBN elements from a screen shot, or zooming/shrinking a portion of your screen.
- The Test windows displays the current EBN to a separate window, and it is visible only if the Test button is clicked.
The following picture shows the panels with blue numbers, from 1 to 4:
Here's the step-by-step guide to follow in order to create a simple EBN file:
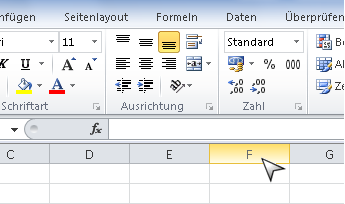
For instance, let's say that we need to provide support for changing the column's header in the exgrid when the cursor hovers it as in the following screen shot ( column F )
1. First step is to get the essential picture from the main picture in order to create a minimal BMP we can use as a base for creating our EBN. You can use the MS Paint for instance, just select the the column F and copy to another MS Paint so we have the following part:
![]()
Next, you can cut unnecessary parts, and finally we get the essential part as it follows:
![]()
2. The second step is running the exbutton's builder (usually it goes to "C:\Program Files\Exontrol\ExButton\Builder.exe" ) so we can take the essential picture and use in creating our new EBN.
-
In MS Paint selects the essential (or part of the) picture and press the CTRL + C so you put it in the clipboard.
-
Run Builder.exe, and "Select Copy Picture From Clipboard" from the Zoom panel so the Zoom panel shows as:
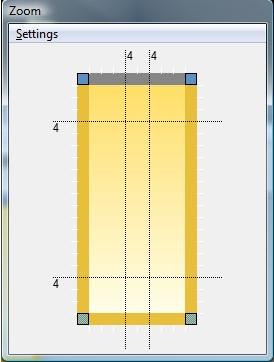
-
As you can see there are four dotted lines that helps you to adjust the corners and the edges of the EBN object. Simple hovers the cursor over each line and adjusts the lines until you get the following:
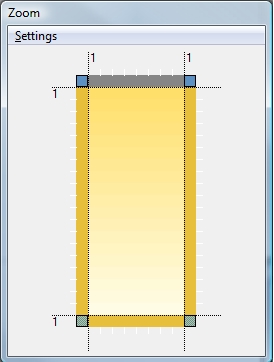
-
Now, since this screen shot contains no transparent colors, click each of 4 corners ( blue ), and drag outside, so the EBN will have no transparent colors and we get this:
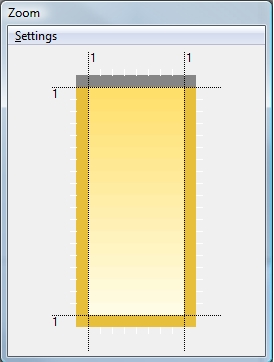
-
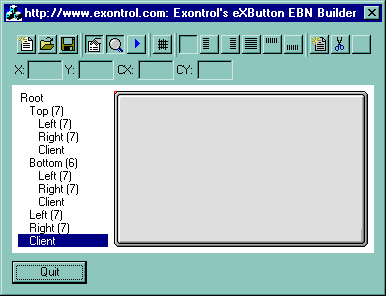
After all these, the first your EBN is being created and the builder should look as follows:
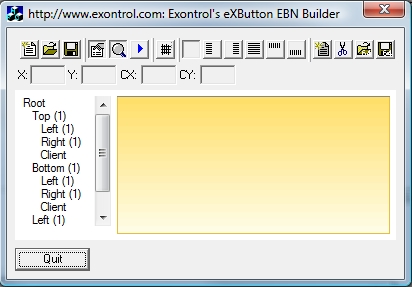
-
All you need to do now is to press the Save or Save64 ( Generates the Base64 string ) to save or create the BASE64 code to be used in the following code. Here's the result saved as excel.ebn.
Finally let's prepare the code to be used for eXGrid so the column's header is changed when cursor hovers the header as follows:
With Grid1
	.VisualAppearance.Add 1,"C:\Temp\excel.ebn"
	.Background(exCursorHoverColumn) = &H1000000
	.DrawGridLines = exAllLines
	With .Columns
		.Add "A"
		.Add "B"
		.Add "C"
	End With
End With
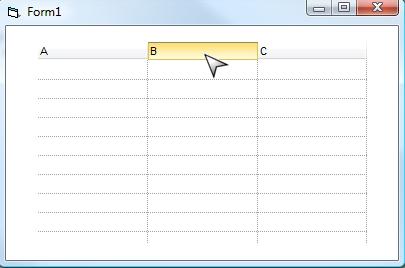
If we run the sample we get the following screen shot when cursor hovers the columns:
Here's the step-by-step guide to follow in order to create a complex EBN file.
For instance, let's say that we need change the visual appearance for the thumb of the control's vertical bar, as in the following screen shot
![]()
If we follow the steps for creating a simple EBN file, the image inside the thumb gets stretched and does not look nice when the vertical scroll bars is resized.
So, by following the simple tutorial we get this ![]() ,
instead we want this:
,
instead we want this: ![]()
In order to prevent this, we need to change the EBN file by inserting a new object that will display the fixed part only, and being in the center all the time. So, here's the steps. The first 2 are the same as you would create a simple EBN.
1. First step is to get the essential picture from the main picture in order to create a minimal BMP we can use as a base for creating our EBN. After cutting the unnecessary part of the picture we get this:
![]()
2. The second step is running the exbutton's builder (usually it goes to "C:\Program Files\Exontrol\ExButton\Builder.exe" ) so we can take the essential picture and use in creating our new EBN.
-
In MS Paint selects the essential (or part of the) picture and press the CTRL + C so you put it in the clipboard.
-
Run Builder.exe, and "Select Copy Picture From Clipboard" from the Zoom panel so the Zoom panel shows as:
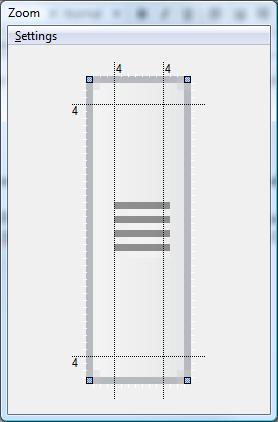
-
As you can see there are four dotted lines that helps you to adjust the corners and the edges of the EBN object. Simple hovers the cursor over each line and adjusts the lines until you get the following:
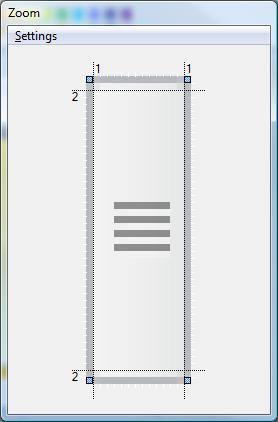
-
Now, since this screen shot contains no transparent colors, click each of 4 corners ( blue ), and drag outside, so the EBN will have no transparent colors and we get this:
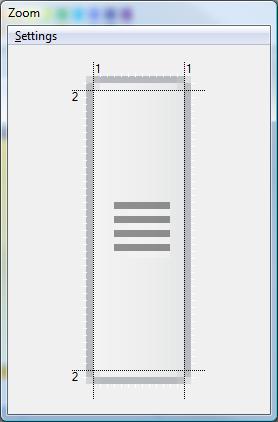
-
After all these, the first your EBN is being created and the builder should look as follows:
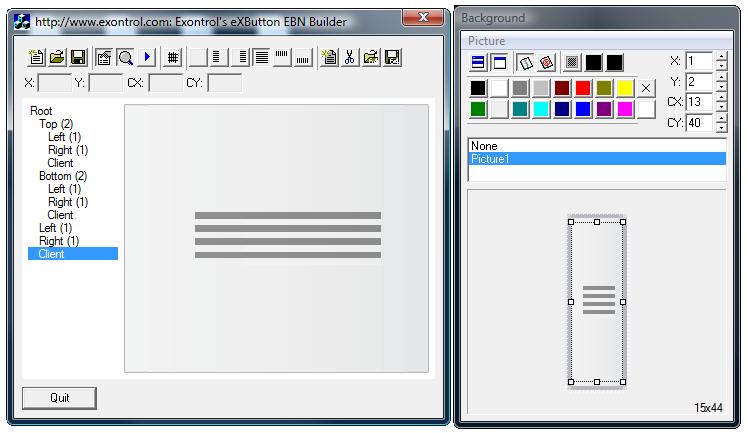
As you can see in the EBN builder, the middle part of the thumb is stretched and we do not want to look like this. So, now we need to replace that part following the steps:
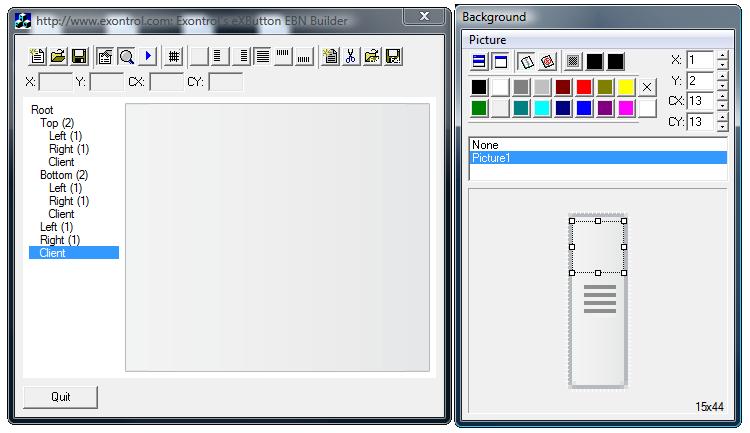
3. Redefining the client area, so it shows no picture inside. Click the Client in the EBN window, then resizes the picture in the Background panel until you get the following result:
4. Adds a new object in the Client area that will show the picture on the thumb.
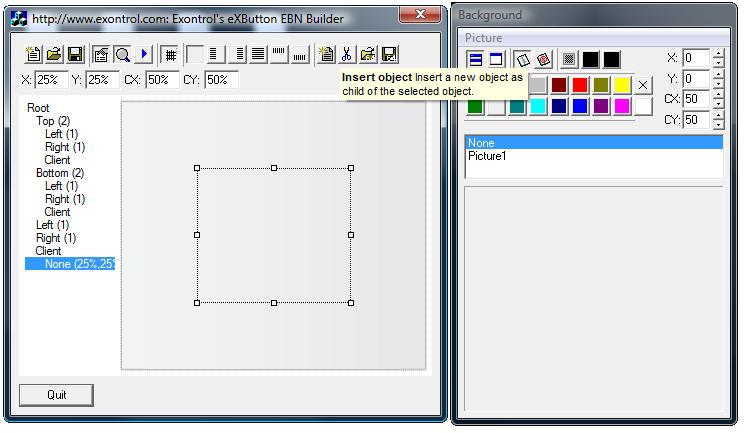
4-A) Adds a
new object: Click the Client in the EBN window, then Click the
Insert button ( )
to insert a new object inside. A new None (25%...) node is being added as a
child of the Client node as you can see in the following picture:
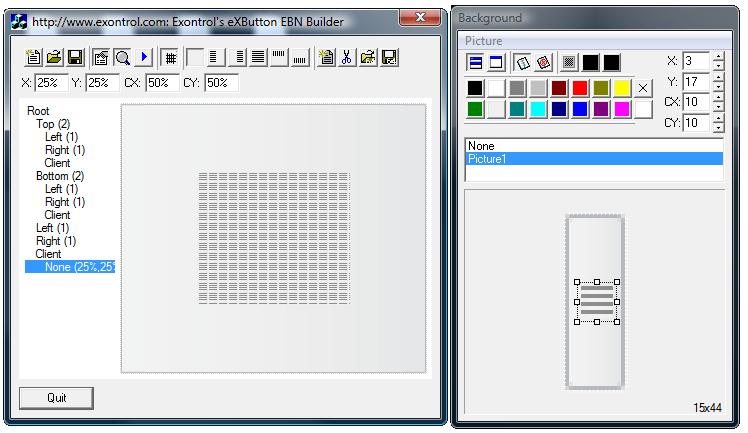
4-B) Defines the picture on the newly node: Click the newly node on the EBN window, Click the Picture1 on the Background window, and then resize the picture until you get the desired result:
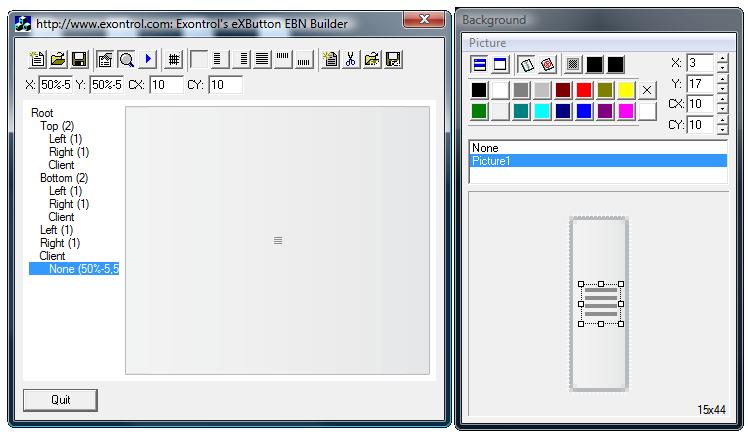
4-C) Resizes newly node so it display only the portion we need: Click the newly node on the EBN window, then go to X, Y, CX and CY fields and type 50%-5, 50%-5, 10 and 10, and finally press ENTER, as in the following screen shot:
Finally, the image from the center of the thumb is not stretched when the entire EBN is resized as in the following screen shot:
![]()
Here's the steps you need to create an EBN file from a picture file (bmp, gif or jpg ):
- Locate and Run the Builder.exe ( designer ) tool in the ExButton's installation folder. ( Usually it is located C:\Program Files\Exontrol\ExButton\Sample\VC\Builder\Builder.exe ).
- Insert your picture using the Zoom\Settings\Load Picture open dialog, or drag the picture file from your Windows Explorer to the Builder tool.
- If necessary, change the size for the margins in the Zoom window.
- If necessary, change the points to specify the transparent colors, in the Zoom window
- Save the EBN file
Here's the steps you need to create an EBN file from a screenshot ( For instance, take your full screenshot by pressing the PRINT SCREEN key, or take your open window screenshot ( currently selected window ), by pressing the ALT + PRINT SCREEN key ) :
- Locate and Run the Builder.exe ( designer ) tool in the ExButton's installation folder. ( Usually it is located C:\Program Files\Exontrol\ExButton\Sample\VC\Builder\Builder.exe ).
- Insert your screen shot using the Zoom\Settings\Load Picture From Clipboard. If there is not screenshot in your clipboard, a warning message is shown.
- If your clipboard contains a screenshot, the Builder tool displays a window called Select Picture, that helps you to select the entire picture or a portion of it. Use the mouse and arrow keys to adjust the portion of the picture you need to insert to your skin file.
- If necessary, change the size for the margins in the Zoom window.
- If necessary, change the points to specify the transparent colors, in the Zoom window.
- Save the EBN file
By default, the Zoom\Settings\Load Picture or Zoom\Settings\Load Picture From Clipboard inserts a picture, assigns borders of 4 pixels wide to the skin, and the corner pixels as being transparent color for corners.
Let's say that we want to create an EBN file that looks like this:- Load the picture file using the
Zoom\Settings\Load Picture, and so the builder applies
the picture to the skin. The first screen shot shows the Zoom
window after loading the picture file. The second screen shot
shows the designer of the Builder tool.
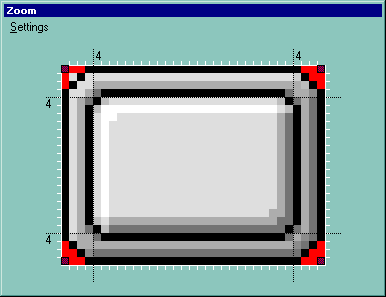 ,
,
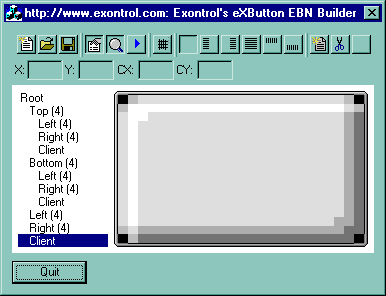
- From the Designer we can see that the client area is not
looking ok, so all we need to do is to adjust the size of the
margins. We need to drag the top margin to 7, the bottom margin
to 6, the left margin to 7, and the right margin to 7, and so
the zoom and the Designer looks like follows:
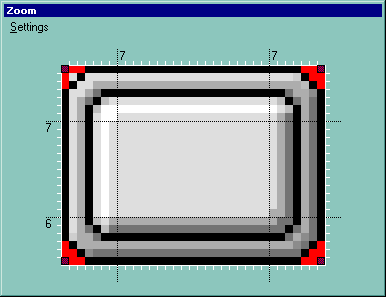 ,
,
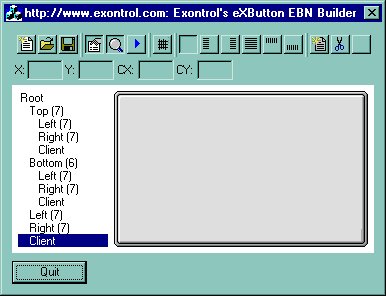
- The Zoom window shows 4 shade corners, that specify the
points that indicates the transparent colors for associated
objects. As you can see in
the designer the red color points are not show, as the each
corner has a transparent color. For instance, if in your case,
you need to get ride of the transparent color, click and drag
the shade point outside of the rectangle where it is displayed,
as we did for the top left corner, and so the Zoom and the
Designer looks like follows:
 ,
,
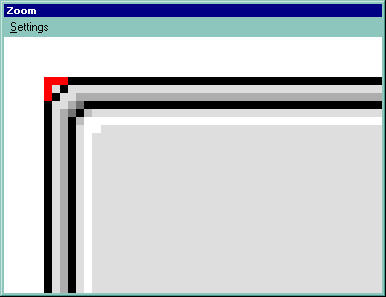
If we magnify the Designer in the top left corner, we can see the red points ( because there is no transparent color for the part, no shade point in the top left corner ):
If we put back the transparent color back, ( click the left/top point in the Zoom window, in the picture area ) we get:
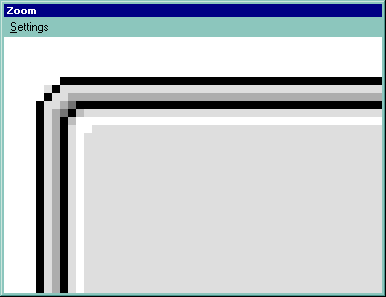
so the round corner is showing back.
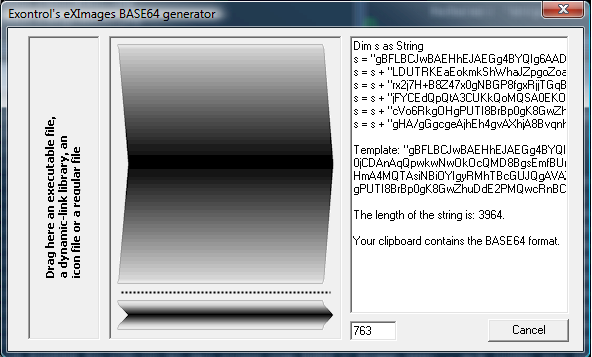
The BASE64 encoded strings hold objects such as icons, images, pictures, or EBN files. In some cases, in order to avoid carrying the files with your setup you can use the BASE64 encoded strings to hard code the object. The Exontrol's eXImages tool can be used to encode files or decode BASE 64 strings.
The following screen shot shows the eXImages tool once you dragged or selecting for copy an EBN file
Using the eXImages tool, you can try one of the followings:
(1) · drag icon files to the left panel
(2) · drag a picture file to the middle panel
(3) · select a file using CTRL + C (Explorer)
in both cases the tool generates the BASE64 encoded strings, for your application.
~ENCODE~
(4) · select the text and press CTRL + C
(5) · select the text, copy and paste it here
in both cases the tool looks for the icons or picture being stored in the encoded string.
~DECODE~
-
Use BMP files as much as possible, because they show an accurate picture when zooming ( not compressed like GIF ot JPG ).
-
Always check the EBN file size. Use small picture files, not huge, so loading and displaying your EBN could be time consuming. By default, the EBN file is compressed, so even if you load a BMP, the EBN is compressed! Even in the case we presented we can reduce the size of the picture from
 ,
to
,
to  ,
and so we still keep the essential parts of the skin. In the first
case, the EBN file's size is 1,722 bytes,
where the second is 515 bytes, which
is better and they display the same skin.
 -
For parts of the skins, that just don't need to screech a picture, just assign a background color for the part if required.
-
When no needed, avoid using transparency, so it will avoid creating regions, and so EBN file could be faster.
-
You can save the EBN file as uncompressed, clicking the Save button while CTRL key is pressed.
-
Don't add multiple pictures, if you don't need them.
-
Don't add new objects that you are not planning to use them.
-
EBN 1004, adds DPI-Aware support as follows:
The "Change the size of apps on the screen" on System setting changes the apps DPI (Dots Per Inch) settings. Based on these settings, the applications that are not DPI-aware but are running on a high-DPI display setting can suffer from many visual artifacts, including incorrect scaling of UI elements, clipped text, and blurry images. The EBN 1004 introduces, the number D, which indicates the value of the number based on the current DPI. For instance, "4" indicates a 4-pixels, while "4D" indicates a 4 dots, or in pixels, is 4 * current DPI settings. So, on a DPI 100%, "4D" indicates a 4-pixels, while on a DPI 150% "4D" indicates a 6-pixels ( 4 * 150 / 100 = 6 ). Any part that EBN displays has left/top and width/height coordinates, to identify the position / size to be shown relative to its parent. In other words, "top[4,back=RGB(0,0,255)]", draws a blue line on the top side of the object's background, of 4-pixels wide, no matter of DPI scaling, while "top[4D,back=RGB(0,0,255)]", draws the line of 4-pixels wide if DPI scaling is 100%, or 6-pixels wide if DPI scaling is 150%.
-
EBN 1003, adds colorable region support as shown bellow:
The Colorable Region defines a portion of the EBN object where the EBN color is applied. The Colorable Region is defined by all points of the EBN object that are between Start and End color. Any object in the EBN, can be colorable or not-colorable, which means that the EBN color is applied or not to this region part when the color is applied to the entire EBN object. For instance, at runtime the identifier 0x1FF0000 applies blue color to all colorable parts that compose the EBN object, excluding the not-colorable objects. In other words, if your EBN shows borders, margins, shadows, ... you can specify them to keep their color when a solid color is applied to the entire EBN object.
The following table shows the same EBN object using or not using Colorable Regions:
colorable-region EBN (1003) all-colorable EBN (previous) 0x1000000 (default) 

0x10000FF (red) 

0x100FF00 (green) 

0x1FF0000 (blue) 

0x100FFFF (yellow) 

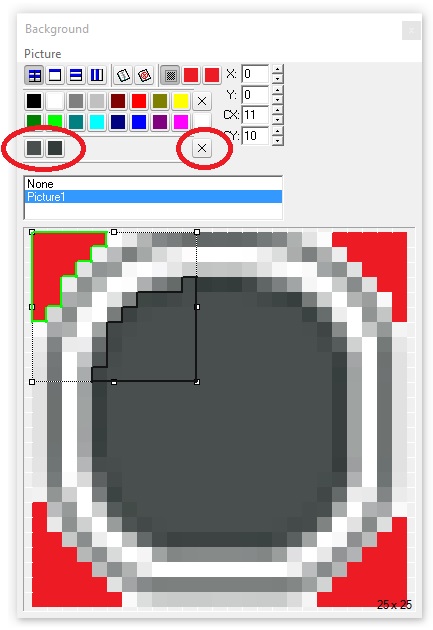
The new Colorable Region Start and the Colorable Region End buttons, of the EBN Builder are marked with red in the Background\Picture as shown bellow:
-
EBN 1002, adds horizontal or vertical stretching and not-colorable support as shown bellow:
1. Horizontal/Vertical stretching, stretches horizontally/vertically the picture on the object's background, and tiles vertically/horizontally the rest. Currently, the EBN 1002 supports tile, stretch, horizontal stretch and vertical stretch.
Having the source picture like
, here's the type of stretching you can have, on the object's background:
tile stretch horizontal stretch vertical stretch The new Background\Picture\Horizontal Stretch and the Background\Picture\Vertical Stretch buttons, of the EBN Builder are marked with red in the Background panel as shown bellow:
2. Colorable, Not-Colorable support, Any object in the EBN, can be colorable or not-colorable, which means that the EBN color is applied or not to this part when the color is applied to the entire EBN object. For instance, at runtime the identifier 0x1FF0000 applies blue color to all parts that compose the EBN object, excluding the not-colorable objects. In other words, if your EBN shows borders, margins, shadows, ... you can specify them to keep their color when a solid color is applied to the entire EBN object.
The following table shows EBN object with not-colorable parts ( borders and shadow ), and EBN object with all-colorable parts with different colors applied.
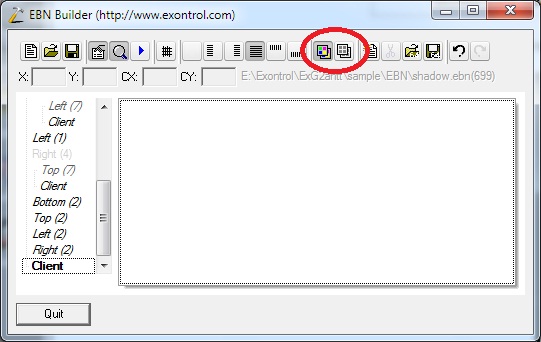
not-colorable EBN (1002) all-colorable EBN (1001) 0x1000000 (default) 0x10000FF (red) 0x100FF00 (green) 0x1FF0000 (blue) 0x100FFFF (yellow) The new Colorable and the Not-Colorable buttons, of the EBN Builder are marked with red in the main panel as shown bellow:
-
EBN 1001, initial release
Click any of the following screen shot/picture, and copy/save the TXT file associated. The TXT file is a template (x-script) file that can be applied to any of our UI components.
Here's what you can do with the TXT file being shown:
- Open the Exontrol's eXHelper tool for the component, and paste the TXT content in the middle panel. Press the CTRL+S to see the result. Right-Click the middle panel, and select the "Convert To ..." item to get the x-script template saved to your programming language such as VB/NET, C#, Delphi and so on.
- Click the control in design mode, locate the Properties item, locate the Template page, and paste the TXT content in the right panel.
Each line in VisualAppearance context indicates an EBN file compressed and saved as BASE64 encoded strings. Most UI parts of our UI components can show any EBN content, so you can combine in any way the following templates.

